• Home
  • My Creations
  • The Backyard Bear Musings
  • Contact Me
  • Store/Window Shop

Happy Canada Day!

6/30/2016

0 Comments

 
Picture
Picture
This year marks my 58th year celebrating Canada Day!  I am proud to be a Canadian.  I don't remember those early years but there are a couple of Canada Day celebrations that stand out in my mind.  One was when I was 10 years old.  It was 1967 and we were celebrating Canada's 100th birthday!  That year at school I remember with my school mates building a log cabin in our classroom out of cardboard and painting it brown to look like logs.  I was obsessed building that cabin and often the teacher had to call me away and to get back to my school work. Looking back I see now that I was born to be an artist.  My passion at a young age was to paint, draw, take apart and remake.  I still am that way and here  I am 48 years later still ripping apart and creating whatever comes to mind.  

My second memory was living a summer in London, England.  I was not quite 18 on that Canada Day.  We celebrated it at our hostel with a huge "Disco" party.  The year was 1974.  It was an awesome summer.

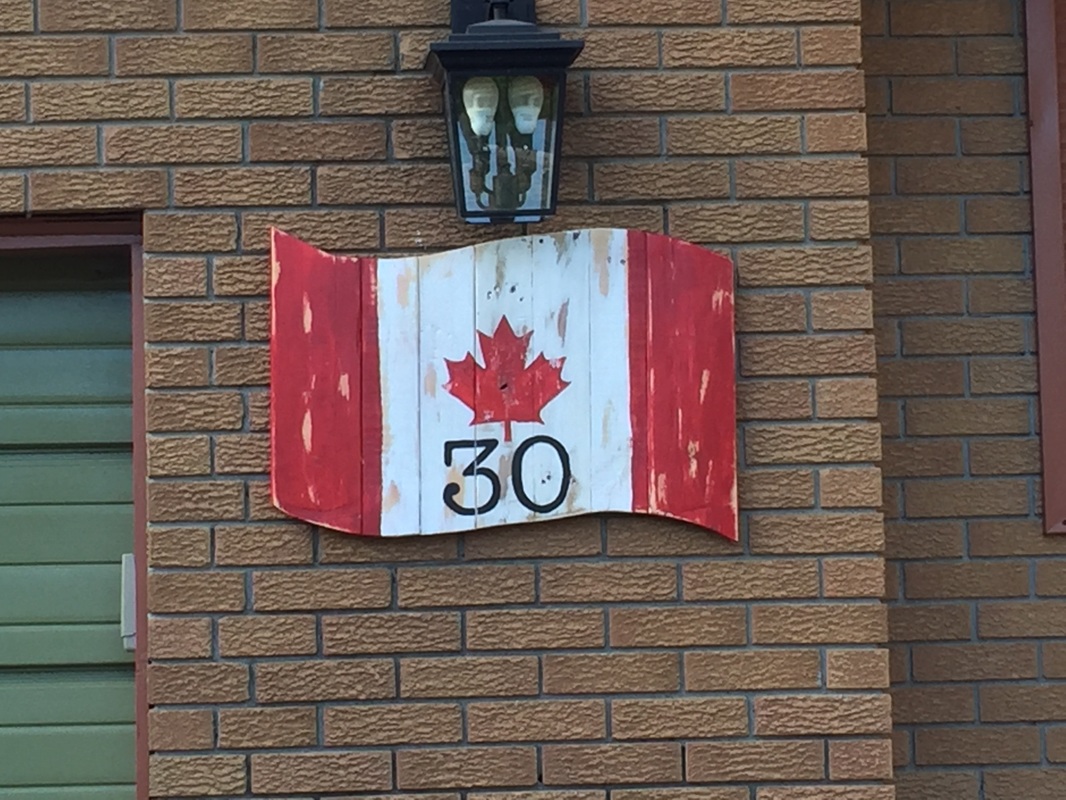
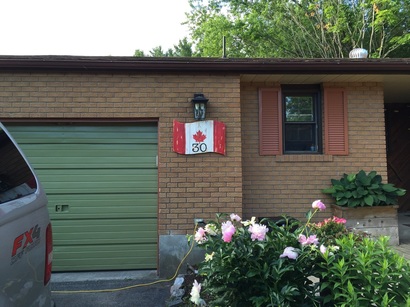
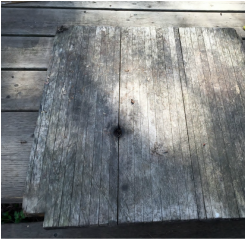
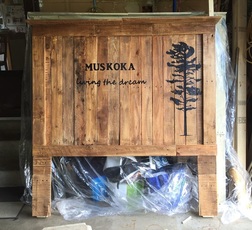
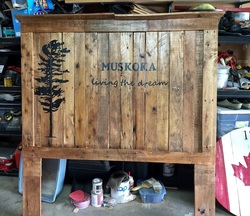
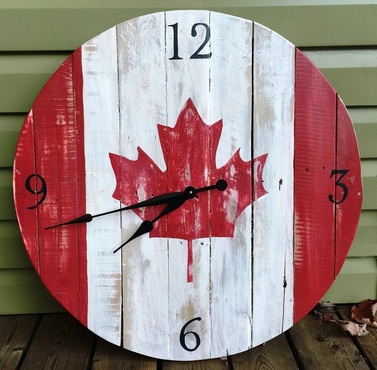
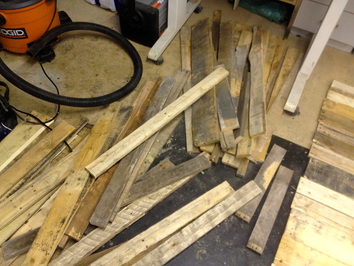
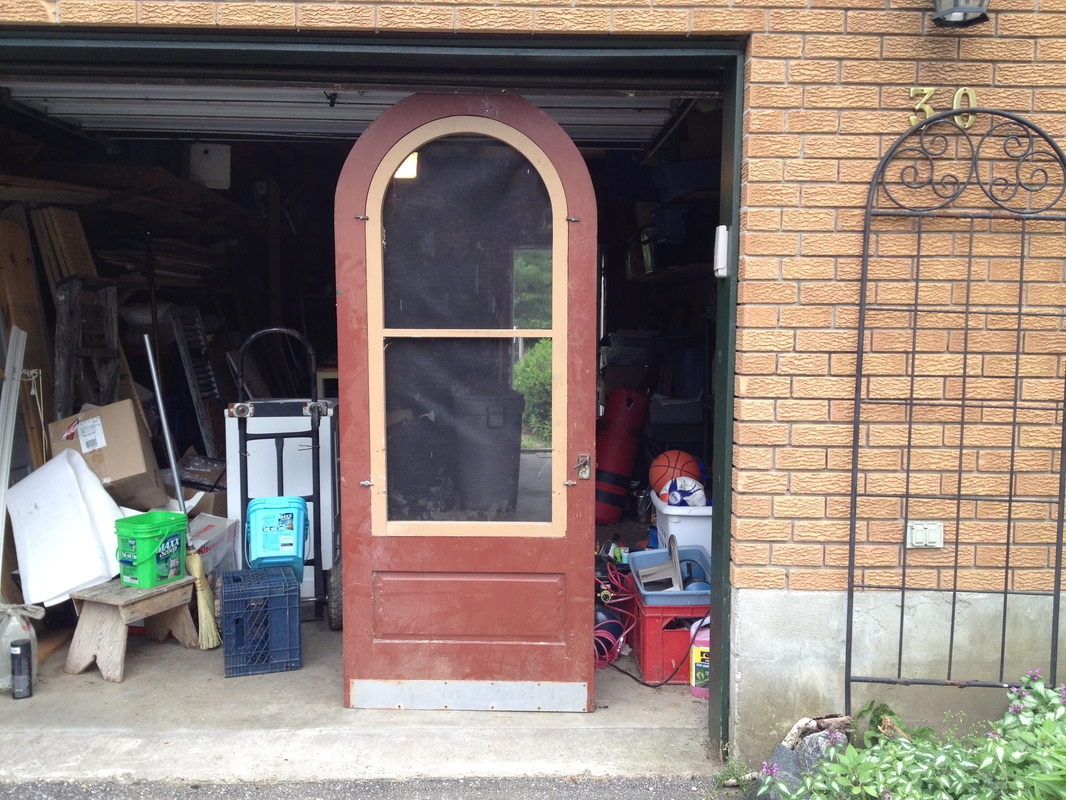
My man Jack never liked the house number that came with the house.  It was boring brass plated and not very visible against the brick of the house.  He requested (last year mind you) if I could make a new house number sign.  After seeing my Canada Clocks he wanted a Canadian flag with our house number on it.  After his 2nd request I decided that if I were to get it made it needs to be done for Canada Day.  Last Sunday I started and completed the sign in one day.  It's made from wood pallets and painted and made to look worn.  Lots of outdoor clear coat to keep it from the elements.  I made sure that house number clearly stood out ;)  

Happy Canada Day Everyone!  ~ Enjoy the long weekend and stay safe.   


0 Comments

Out of Rust and Wood (and a Leafy Grave)

5/31/2016

0 Comments

 
Picture
Picture
I have a hard time throwing things out…especially old rusty items.  Ask the other half, he believes he’s in love with a hoarder.  Now I will admit I have a rather “large” stash of items to keep me creative but one thing he has learned is that if I set my mind to make something it gets made. Most times he is quite surprised at what is recreated out of what HE would have tossed away, recycled or burned. "Junk" he calls it, "just Junk".  Well what is another Man's junk is another Woman's Treasure!  I keep reminding him of that ;)

This week's project started out as a metal table which probably held a large sized tool in its early useful life.  Years ago after purchasing my house I saw it sitting sadly in the far back corner of my yard just rusting away.   I moved in late August and was far too busy getting my new house up and running to worry about a rusty table.  The next summer this metal table was resurrected from the leaves and debris and used as a rain barrel stand.  I needed something in a pinch and it worked.  A few years later the rain barrel was moved and no longer needed so the rusty table was brought to the back of the property to sit yet again for another year.  This spring however it was all about cleaning up the property and as old railway ties were pulled out of their leafy graves I spotted the forgotten rusty metal table.   Hubby was ready to burn the wooden part of the table and recycle the metal.  Luckily I was there and rescued that table.  I instantly had an idea and proceeded to create what I envisioned.

My first task was to lightly sand down the rust, but only just enough.  The rust patina was beautiful and if you are a Rustaholic like I am, you just don’t clean something up like that - you preserve it, a history of neglect and just the right amount to give it charm.  I clear-coated the rust with several outdoor coats to keep the rust from forming and rubbing off.  Cutting apart pallets which I gathered from the side of the road and sanding them down I made a rectangular table top.  The table frame is 33 inches high and I envisioned it to be used as an outdoor patio table if one could find the right stools.  I painted the boards, sanded and distressed them and then stained a nice grey stain over the whole table top.  Next I painted on my favourite animal…a black bear and added a few bear paw prints.  Another sanding and then  several clear coats later it is ready for the back yard deck.
 
The other half has learned not to question me when I see something at a yard sale or on the road.  He knows eventually it will be made into something and he seems to be some what amazed at the outcome.  One thing he has also learned…you can’t keep a creative person down…you have to let her do what she does best……like a caged animal she will get restless and although I don’t bite…I could get quite cranky ;)  Have a great day everyone…and till my next project…keep on smiling!

0 Comments

So Have You Missed Me?

2/21/2016

0 Comments

 
Picture
Picture

​It's all Facebook's fault.  I have a Facebook page which seems to get my attention a lot more than my blog and I apologize.  Now it's time to catch up here.  

​This past year saw me painting many pet portraits and I was also commissioned to make headboards for a Muskoka cottager.  To this cottager, living in Muskoka was "Living the Dream", hence she wanted me to incorporate that saying on the headboards.  The headboards were all made from wood pallets.  I love wood pallets.  They have so much to offer.  Nothing gets wasted.  Once I use all the useful boards the rest I burn in our wood stove to keep us warm.  

Last summer I was also commissioned to make a Canadian flag clock out of pallets.  This is an outdoor clock which will grace my customer's deck, overlooking their back yard.  I really enjoyed making this clock.  It measures 30" in diameter.  Painted, distressed and clear coated it can take on the elements.
Picture

Read More
0 Comments

The Making of a Clock

9/21/2014

0 Comments

 
Have you ever seen those large clocks that look old but have been recently made.  We wanted one of those clocks and after shopping around and seeing how expensive they can be ($150 and up) I decided to make my own.  I had enough left over pallets from my headboard project which could be nailed together to make a square.  This is how I made my outdoor clock.


The pallets were laid out to make a square with the best sides facing down on a flat surface.  To join the pallets I glued and nailed scrap wood onto the back.  Turning it over I drew a circle using a nail and string. My clock circle measured 39" in diameter…it can be any size you want it to be.  The circle was cut out using a jig saw.  The small pieces on top and bottom had become unattached as the scrap wood was cut away so I added more pieces of scrap wood to attach these pieces .  It didn't look pretty but it didn't matter as it was the back of the clock.  Once that was completed I turned the circle over and sanded it  with an orbital sander.  Using leftover white paint (which I watered down) I whitewashed the clock using a rag.  Once it was dry I stencilled on the numbers and paddles.  The numbers and paddles were printed from my computer and I used stencil paper to outline the numbers on the wood.   The numbers were painted with black latex artist paint.  Once the paint was thoroughly dry I hand sanded the clock again giving it an aged look going down to wood in some areas.  Cleaning it off using a tack cloth I then sprayed it was a satin finish clear coat.  I sprayed 4 coats to give it durability.  A hole was drilled in the centre of circle to install the clockworks which were purchased online from a store in Ontario.  As the back of the wood was too thick for the clockworks I had to drill out enough wood using a forstner bit to inlay the clockworks.  My clock cost under $45 which was what the clockworks cost (including $15 postage).  
0 Comments

Spring Cleaning the Crafting Room (well more like Unhoarding the Crafting Room)

3/16/2014

1 Comment

 
This is my craft room before the major organization job.  I know your probably wondering how I even did any work in a room like this.  It wasn't that bad last fall when I went into full production mode to make items to sell at the Christmas craft shows but after Christmas I took a break and just kept the doors closed..well, until last week when I opened the door and thought I have a hoarding problem.  Time for an intervention.  I thought that since we are having such a long cold winter/spring I may as well use the indoor time to revamp my room.  Little did I know it would take me a total of 12 hours to give it a thorough cleaning.  I went through every box...you know the ones where you just throw stuff in because its convenient at that time.  I sorted through everything, all the bits and pieces of left over sweaters, the boxes of small craft supplies, papers, patterns, paints, paint brushes, shopping bags full of this and that etc etc.  I found so many things that I forgot about...those things that are  picked up at a yardsale because it could be made to make this or that.  So I purged.  I recycled 4 large blue bags of cut up sweaters.  Two large plastic bins for our spring yard sale and funny enough only a small grocery bag of garbage.  I try to recycle everything so if it was plastic, fabric or paper it was recycled.  I was actually pretty excited about cleaning (not something I normally like).  Its so welcoming now to walk into this room.  
Picture
I have a lot of sweater/fabric to make mittens, dog sweaters, hats etc.  Normally I hang my sweaters but once they are cut and cannot be hung again I just folded them the best I could and put them on my metal shelves.  The only problem with this is that when you decide to pick out a piece of material the whole stack comes tumbling down and if your in a hurry and in production mode like me, I just grab the fallen stack  and cram them back onto the shelf.  I decided to take a trip to the dollar store and found these "pop up" laundry hampers.  These work great because they can expand and everything stays in its place.  I can take one down, pull out my material and put it back on the shelf.  At a $1.25 I bought a few extra for just in case.  To fill up in between these baskets I have collected a number of plastic zippered bags that come when you buy new bedding.  These fit perfectly between the baskets and hold smaller pieces of materials that can't be folded.  I also find that the extremely large Zip Lock bags work well to hold supplies but are harder to stack on a shelf.

Picture
The wood shelves I already had in the room.  The bottom table/shelf is an old 1970's bar which is turned around.  Above it I have wooden shelves rescued from my old office and the other wooden shelf is the top of a hutch which came when Jack moved in.  We have no room for it upstairs so its part of this room for now.  The wooden table is an old table I rescued from a yard sale.  It opens up with a flip up centre piece which makes it about another foot longer.  Just perfect for cutting out my crafts.  
Picture
And this my friend is the awesome thread holder my son made me for Christmas.  I love handmade gifts and every year my son works away in my workshop like a little Santa elf. I asked for something I could display my thread on and he came up with this invention.  Pretty amazing.  I can see all the colours at a glance.  It goes with another thread holder he made me as another present two years ago and I have that mounted on the wall in front of my sewing machine.  That one I use mostly for bobbins and to display vintage thread in the wooden spools.  Just love them both!
Picture
Now that its all done I can't wait to start sewing/painting again.  
This is my craft room before it underwent a well deserved spring cleaning.  
1 Comment

Rustic Headboard

3/8/2014

4 Comments

 
We needed a headboard for our king size bed but we didn't want just any headboard. After looking at various headboards on the internet I saw one made from wooden pallets. I totally fell in love with it and according to the author, it was built by someone who didn't have any experience with a hammer let alone power tools.  After googling more pallet headboards I decided to make one...going one step further I added vintage paddles which I have been collecting over the years.

Pallets should be easy to come by but with the winter we have had I'm sure that any free pallets are being scooped up for firewood.  I visited the local Home Depot store and asked if they had anything I could take off of their hands and was lucky to pick up 4 pallets and which were in very rough condition.  A few days later my boyfriend was able to pick up 2 more at another store that were in much better shape.  Not to be discouraged at the condition the ones from Home Depot, I started taking them apart.  To take the pallets apart I used a skillsaw, a sawsall with a metal blade to cut nails, a hammer, pry bar and alot of umph!.  I recommend getting more pallets than you think you might need as the wood can split apart easily especially when your prying apart the 2x4 from the middle of the pallet.  After a lot of grunting I had a pile like this
Picture
Next was the layout.  Originally I placed the boards horizontal but found that I needed to piece-in random sizes of wood and although it looked nice it was way more work than I wanted to do.  The boards I had were 40" long and so I layed them out vertically on a flat service in my work shop.  (Size of the kingsize headboard is 40" tall by 80" wide and including the legs it was 62" tall).  Once I had a mockup of the size I purchased 2 - 2x4's and 2 - 2x2's from the lumberyard and laid out a frame making it at least 2" smaller on the sides (2x4's), and also making sure that since I was going the mount the headboard onto the metal bed frame that the 2x4 would be centred over the bedframe holes. I glued/screwed the panel pieces on through the back so as to not have any screws showing.  To help stabilize the boards I glued and screwed on 2 scrap pieces of board onto the back of the panels.  Once that was finished I framed the outside using pallet wood by gluing the boards on and using finishing nails to nail the frame on.  Using an oribital sander I sanded the panels and frame.  Parts of this wood was quite rough but a good sanding helped keep the splinters at bay.  I decided to stain the headboard with leftover stain I had (Puritan Pine).   Next I purchased milk paint online through Lee Valley Tools.  A confession, I am a Milk Paint Virgin and had no idea what this piece would look like.  Milk Paint naturally peels to give it an aged look.  Apparently on rough wood it will just soak in (even after I had stained it) so peeling never happened with the first coat of bayberry green milk paint.  Once that coat was dry I randomly spread vaseline onto the wood and painted it with buttermilk colour milk paint.  The paint did not stick where the vaseline was therefore it gave it a "chipped" look.  Once that paint had dried I used a 100 grit sand paper and hand sanded the headboard lightly all over and then concentrated on the places where the green paint was showing through to give it a more aged look. After I used Min Wax with a soft cloth and waxed the painted surface and the vintage paddles.
Here is the finished headboard.  Cost was minimal with the most money spent on milk paint which I had to order online.  Now I am looking forward to building a queen size version for my son's room.  

I hope you enjoyed reading my blog.  Please leave your comments.  I would love to hear what you think :)
4 Comments

The Potting Shed

11/22/2012

9 Comments

 
PictureOld shed partially taken down.
This past summer I spent almost all of my weekends building a potting shed.  Originally I had an old shed with a rotten floor with doors that were only partially hinged and locked with a plastic fork.  It was only used to store stuff that I probably should have thrown away years ago.  At least 25 years old it was slowly sinking into the soil.  

I had always dreamed of a potting shed.  Not just any old shed but one that would be my woman cave. I could go inside when I needed some me time...some breathing space and I could just sit and play in the dirt or just relax and read a book.


I spent a wet weekend tearing down the old shed and ordered a plan off of the internet.  Little did I know that this shed would start in June and end in September.  

I come from a family of carpenters and I think I carry that gene.  I've built a few sheds within the past 10 years.   Some from kits, some stick framed. This one though started out as simple but my imagination took over..and in the end became exactly how I envisioned it.

The original plan was a 10' x 10' x 14' high shed.  I wanted a tall ceiling as I've seen English potting sheds that almost looked like a church.  

Picture
Basically it all started with a door.  I had gone to the local landfill and found this door sitting in the "reuse" building.  It was awesome.  A solid wood screen door with a round top.  Exactly what I wanted.  Driving home with this awesome free door in the back of my truck I started to think of how my potting shed would look.  Then I started to panic.  How am I going to build a door frame for this door?  Not to worry though I was able to google and work through what was needed and it all came together.


Picture
The shed plans ordered and printed off I started to build my shed. 


Picture
Then I started to think...maybe I should put a skylight in?  Maybe I should have a small deck and and overhang as well?  Well...it was a design/build job.  This is a pic of me tar papering the roof section.  I've never really been afraid of heights but it was a little intimidating as it had a 12-12 pitch.  

Picture
Gotta love Kijiji.  I bought these shingles for half the regular price at Home Depot.  

Picture
The shed just kind of started to become its own.  The old plans only being a guide.  I used rough cut pine for the siding and cedar shakes for the front installed randomly.

Picture
By September the shed was completed and landscaped.  I can't wait until I can actually use it as a potting shed this spring.  Rain barrels will be attached to the downspout and more landscaping will be done in the spring.  

Total cost to build my shed was $1500.  I used an old window for the side and the large window is only screened  but is covered up for the winter months with chipboard that folds down into a table in the potting months.  

This is my WOMANCAVE!!


Picture
Picture
Inside showing the table which folds up to cover the window in the winter.
Picture
The vanity was found the same day as the door at the landfill site. The enamelled bowl fit just perfect. A great place to wash my hands! The window is from a metal screen door.
Picture
Found this bird house at a thrift store!
Picture
The skylight!
Picture
Love my pond!
Picture
Winter View
9 Comments

Putting the Bear in the Backyard Bear

4/15/2012

0 Comments

 
Picture
On a "I'm bored...what do you want to do today?" in February we decided to check out a chainsaw carving show at a town just south of us.  Little did I know that I would come home with one of the "largest" (pun in tended) purchase of the season! 

Picture
Meet Moose The Bear!
Yes that's what we named him :)

0 Comments

The Longest Days on the Shortest Days of the Year

1/24/2012

1 Comment

 
Its mid-January....the days are short but seem so long.  The holidays are over and the hectic nights of sewing, painting, selling crafts...making sure everything is ready for that big day is in the past.

Picture
January brings hibernation.  Our bodies want to relax and sleep just like the bears.  The nights start early and stay late into the morning.  I am not one to sit still, but this time of year I fight the urge to just do nothing and stay inside so I try to get outdoors and enjoy the winter fresh air.   Up here in Canada we love our sports.  Hockey is number one and pond hockey has become very big in a town just north of where I live.  In fact they have the biggest pond hockey tournament in the world!  I used to play hockey but gave that up a few years ago.  Baseball is my passion now.  Last weekend on the snowy fields in our town a group of us with bats and gloves, heavy winter boots and toques walked through the snow to the baseball field.  There we attempted to play ball.  Talk about an exercise program we created!  Running to first base when your the first at bat takes a lot of physical exertion and it doesn't get any easier if your the last at bat either!.  We played for over an hour and BBQ'd hot dogs and drank hot chocolate.  Lots of fresh air, food and good friends. 

Picture
On the crafting side I have been lazy almost forcing myself back to the painting table and into my sewing room.  Once I'm there its all good but the urge to just curl up in front of a fire and hibernate is very hard to fight.  I've been painting more mason jar solar lights.  Most of these jars have dates stamped on the bottom.  Some I have go back to the early 30's.  I often wonder what these jars could say if they could talk.  Who packed them with fruits and sauces and pickles and put them on a shelf to be eaten?  What were these families like? Now these jars are re-used for solar lights.  Did anyone in the 30's even imagine a solar light let alone crafted from the jar they just ate from?  We have come a long way in the past 80 or so years.  I try to stay true to the old ways by creating objects from discarded items.  That's what my parents and grandparents did and I feel proud to be continuing that part of them.  Whether it was out of necessity back in their days or just out of a creative passion for me it all works out positive.  Reduce/Reuse/Upcycle.  Every little bit helps the planet..  We should all try it at least once.


1 Comment

2011 - A Year to Reflect On

12/30/2011

0 Comments

 
What a busy year I had with craft sales.  Lots of mittens were made and sold and were found under the Christmas tree, as were mason jar solar lights and hats from sweaters. Decorations painted on small slabs of branch are hanging on trees.  I wonder how long they will stay in the family.  If its like me, I cherish my handmade tree decorations.  I still hang decorations my now grown children made when our weekends were busy with "craft days".  Its also a great feeling to know that people are opening up gifts made by me and saying they love it.  I've had many people email me and message me on my Facebook page about how warm my mittens are.

Now this year is over and a new one begins.  I have ideas in my head of new things to make and sell.  Just recently I made a purse from an old sweater which I couldn't throw out.  Of course it had a bear on it.  This one a polar bear and is great for the winter months.   I have another sweater with a silhouette squirrel design which will also be made into a purse.  That one will be used in the summer months ahead.  You can find a tutorial on purse making here.

I also want to show you some of the handmade presents I received from my kids this year.  My adult daughter made me veggie garden stakes. These stakes are large enough to not get lost during the height of the season.  She also made me a beautiful mug at  a creative craft shop.  It is hand painted then fired with silhouette of ravens on a  wire.    My son made me a place to store spools of thread.  I have it hung up on the wall in front of my sewing machine. My thread keeper is filled with vintage spools of thread which I pick up at thrift stores.  This thread is as good as it was the day it was made.  I make use of the thread in my sewing projects.

I hope 2011 was a good one for you and lets make 2012 even better.  Lets make the world a little less messier by reusing and remaking items like they did before "disposable" became a word.  Every item has at least a 2nd life and all you need to do is to remake or sell or donate that item to a place where it can become "loved" yet again.

                                                                          ~~~~~~~~


Picture
Picture
Picture
0 Comments
<<Previous

    About Me

    I am a self-taught wildlife artist from Muskoka, Ontario Canada

    Archives

    May 2016
    February 2016
    September 2014
    March 2014
    November 2012
    April 2012
    January 2012
    December 2011
    November 2011
    March 2011
    February 2011
    January 2011

    Categories

    All
    2011
    2012
    Art
    Artist
    Backyard
    Baseball
    Bear
    Beaver
    Carving
    Chainsaw
    Christmas
    Clock
    Craft
    Dowel
    Duct Tape
    Hats
    Hibernation
    Hiking
    Hockey
    Jon Gnagy
    Manikin
    Mason Jar
    Mentor
    Mittens
    Moose
    Mug
    Night
    Painting
    Raven
    River
    Riverside
    Sales
    Sewing
    Sketching
    Snowshoeing
    Solar Lights
    Thread
    Upcycle
    Vegetable Markers
    Vest
    Winter
    Wood
    Woodpecker

    RSS Feed

Powered by Create your own unique website with customizable templates.