This is my craft room before the major organization job. I know your probably wondering how I even did any work in a room like this. It wasn't that bad last fall when I went into full production mode to make items to sell at the Christmas craft shows but after Christmas I took a break and just kept the doors closed..well, until last week when I opened the door and thought I have a hoarding problem. Time for an intervention. I thought that since we are having such a long cold winter/spring I may as well use the indoor time to revamp my room. Little did I know it would take me a total of 12 hours to give it a thorough cleaning. I went through every box...you know the ones where you just throw stuff in because its convenient at that time. I sorted through everything, all the bits and pieces of left over sweaters, the boxes of small craft supplies, papers, patterns, paints, paint brushes, shopping bags full of this and that etc etc. I found so many things that I forgot about...those things that are picked up at a yardsale because it could be made to make this or that. So I purged. I recycled 4 large blue bags of cut up sweaters. Two large plastic bins for our spring yard sale and funny enough only a small grocery bag of garbage. I try to recycle everything so if it was plastic, fabric or paper it was recycled. I was actually pretty excited about cleaning (not something I normally like). Its so welcoming now to walk into this room. 
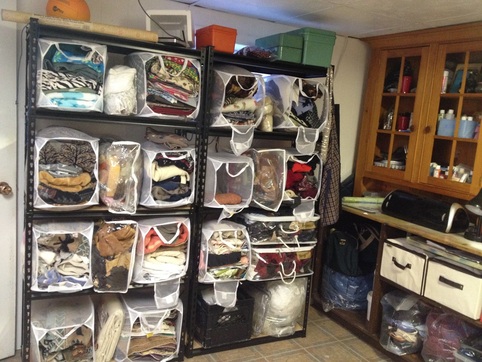
I have a lot of sweater/fabric to make mittens, dog sweaters, hats etc. Normally I hang my sweaters but once they are cut and cannot be hung again I just folded them the best I could and put them on my metal shelves. The only problem with this is that when you decide to pick out a piece of material the whole stack comes tumbling down and if your in a hurry and in production mode like me, I just grab the fallen stack and cram them back onto the shelf. I decided to take a trip to the dollar store and found these "pop up" laundry hampers. These work great because they can expand and everything stays in its place. I can take one down, pull out my material and put it back on the shelf. At a $1.25 I bought a few extra for just in case. To fill up in between these baskets I have collected a number of plastic zippered bags that come when you buy new bedding. These fit perfectly between the baskets and hold smaller pieces of materials that can't be folded. I also find that the extremely large Zip Lock bags work well to hold supplies but are harder to stack on a shelf. 
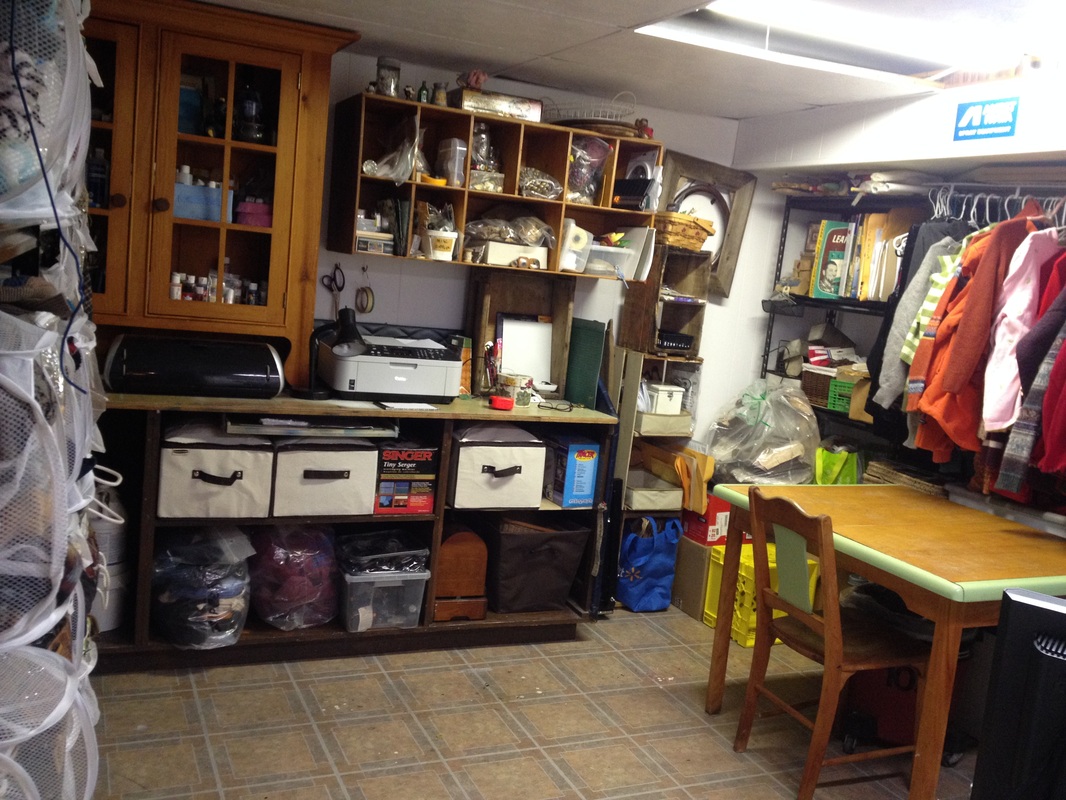
The wood shelves I already had in the room. The bottom table/shelf is an old 1970's bar which is turned around. Above it I have wooden shelves rescued from my old office and the other wooden shelf is the top of a hutch which came when Jack moved in. We have no room for it upstairs so its part of this room for now. The wooden table is an old table I rescued from a yard sale. It opens up with a flip up centre piece which makes it about another foot longer. Just perfect for cutting out my crafts. 
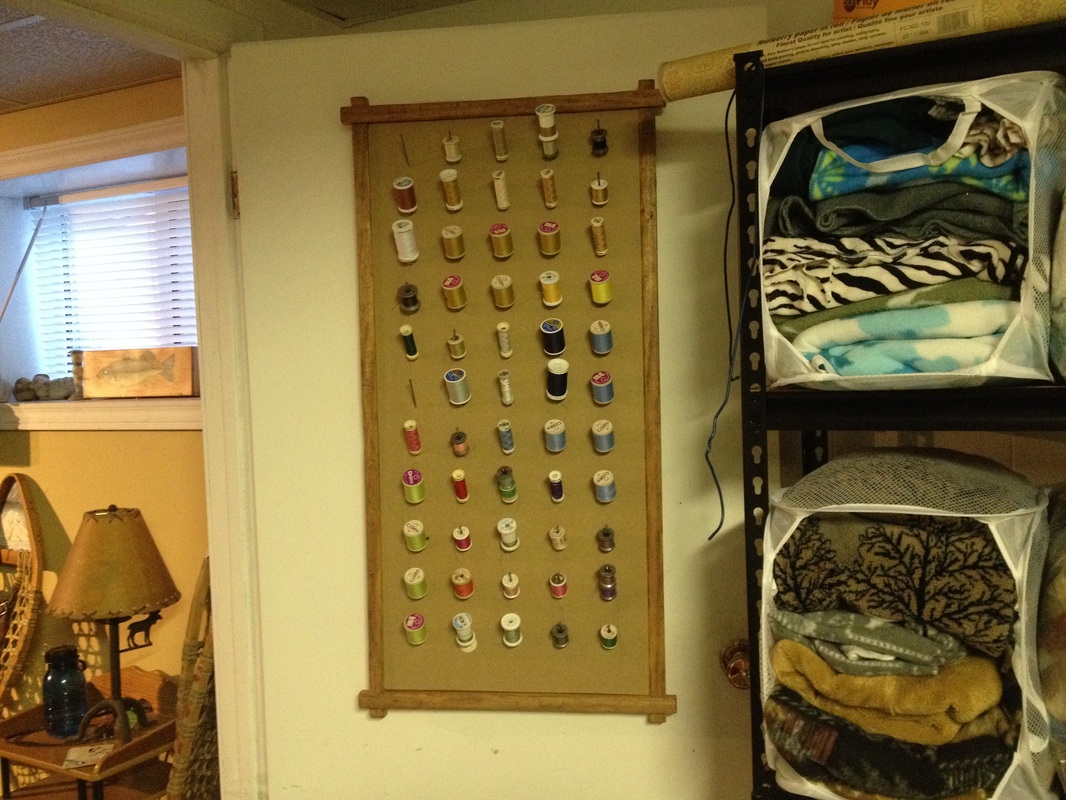
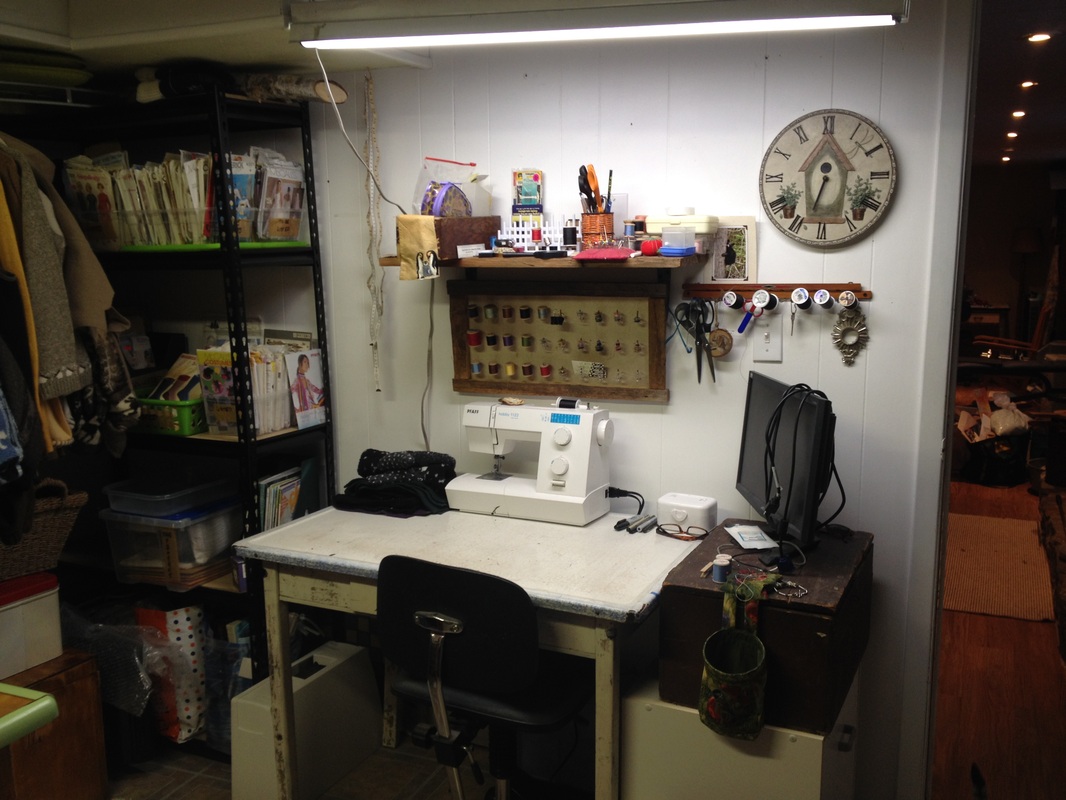
And this my friend is the awesome thread holder my son made me for Christmas. I love handmade gifts and every year my son works away in my workshop like a little Santa elf. I asked for something I could display my thread on and he came up with this invention. Pretty amazing. I can see all the colours at a glance. It goes with another thread holder he made me as another present two years ago and I have that mounted on the wall in front of my sewing machine. That one I use mostly for bobbins and to display vintage thread in the wooden spools. Just love them both! Now that its all done I can't wait to start sewing/painting again. This is my craft room before it underwent a well deserved spring cleaning.
1 Comment
We needed a headboard for our king size bed but we didn't want just any headboard. After looking at various headboards on the internet I saw one made from wooden pallets. I totally fell in love with it and according to the author, it was built by someone who didn't have any experience with a hammer let alone power tools. After googling more pallet headboards I decided to make one...going one step further I added vintage paddles which I have been collecting over the years. Pallets should be easy to come by but with the winter we have had I'm sure that any free pallets are being scooped up for firewood. I visited the local Home Depot store and asked if they had anything I could take off of their hands and was lucky to pick up 4 pallets and which were in very rough condition. A few days later my boyfriend was able to pick up 2 more at another store that were in much better shape. Not to be discouraged at the condition the ones from Home Depot, I started taking them apart. To take the pallets apart I used a skillsaw, a sawsall with a metal blade to cut nails, a hammer, pry bar and alot of umph!. I recommend getting more pallets than you think you might need as the wood can split apart easily especially when your prying apart the 2x4 from the middle of the pallet. After a lot of grunting I had a pile like this Next was the layout. Originally I placed the boards horizontal but found that I needed to piece-in random sizes of wood and although it looked nice it was way more work than I wanted to do. The boards I had were 40" long and so I layed them out vertically on a flat service in my work shop. (Size of the kingsize headboard is 40" tall by 80" wide and including the legs it was 62" tall). Once I had a mockup of the size I purchased 2 - 2x4's and 2 - 2x2's from the lumberyard and laid out a frame making it at least 2" smaller on the sides (2x4's), and also making sure that since I was going the mount the headboard onto the metal bed frame that the 2x4 would be centred over the bedframe holes. I glued/screwed the panel pieces on through the back so as to not have any screws showing. To help stabilize the boards I glued and screwed on 2 scrap pieces of board onto the back of the panels. Once that was finished I framed the outside using pallet wood by gluing the boards on and using finishing nails to nail the frame on. Using an oribital sander I sanded the panels and frame. Parts of this wood was quite rough but a good sanding helped keep the splinters at bay. I decided to stain the headboard with leftover stain I had (Puritan Pine). Next I purchased milk paint online through Lee Valley Tools. A confession, I am a Milk Paint Virgin and had no idea what this piece would look like. Milk Paint naturally peels to give it an aged look. Apparently on rough wood it will just soak in (even after I had stained it) so peeling never happened with the first coat of bayberry green milk paint. Once that coat was dry I randomly spread vaseline onto the wood and painted it with buttermilk colour milk paint. The paint did not stick where the vaseline was therefore it gave it a "chipped" look. Once that paint had dried I used a 100 grit sand paper and hand sanded the headboard lightly all over and then concentrated on the places where the green paint was showing through to give it a more aged look. After I used Min Wax with a soft cloth and waxed the painted surface and the vintage paddles. Here is the finished headboard. Cost was minimal with the most money spent on milk paint which I had to order online. Now I am looking forward to building a queen size version for my son's room. I hope you enjoyed reading my blog. Please leave your comments. I would love to hear what you think :) |
About MeI am a self-taught wildlife artist from Muskoka, Ontario Canada Archives
May 2016
Categories
All
|